From the Archives: Logging accelerometer data from the micro:bit
Another one from the archives, hence the date. I’m republishing this one because it has some interesting information about the micro:bit’s accelerometer, though the actual data logging part might be a bit moot given the improvements that have occurred to MakeCode’s functionality.
What would we need to do to have the micro:bit be a useful logger of acceleration data?
- Set a sampling rate
- Store data on the micro:bit’s local storage
- Play the data back or transfer it to a computer for analysis
The micro:bit has an accelerometer and magnetometer (compass) powered by ST’s LSM303AGR chip https://www.st.com/en/mems-and-sensors/lsm303agr.html. According to the chip’s technical specs, in terms of acceleration, you can use the micro:bit to measure acceleration up to ±16g (1g being acceleration due to gravity, i.e. 9.8 m/s2—- 16g is 16x acceleration due to gravity). The micro:bit uses this chip to detect gestures but it can also be used just to read acceleration in 3 axes.
In this first part, I will show a method of setting the sampling rate and plotting the accelerometer data from the micro:bit.
Setting a sampling rate
What might not be obvious is that for some things, the micro:bit is actually running really fast. For example, if all we do is call accelerometer.get_values() (which emits a tuple of the x, y, and z accelerations as measured by the accelerometer), the micro:bit can read in excess of 1400 times per second. You can try it yourself with:
from microbit import *

counter = 0

while True:
    if counter % 5000 == 0:
        print('{n} iterations in {t} ms ({rate} per second)'.format(
            n=counter,
            t=running_time(),
            rate=counter*1000/(running_time())))

    accelerometer.get_values()
    counter = counter + 1
Of course, every additional line of code we add would slow down execution, but practically speaking, we probably only need to sample acceleration at most 10-20 times per second (sampling frequency). To get the sampling period, i.e. the time between samples, recall that period is the inverse of frequency:
\[period = { 1 \over frequency }\]Thus, to achieve a sampling frequency of 10 times per second, we need to leave 1/10 of second (100 milliseconds) between samples. We can do this using the micro:bit’s built-in sleep() function as follows:
from microbit import *

frequency = 10

while True:
    print(accelerometer.get_values())
    sleep(1000/frequency)
You might notice that I used the print() function in the previous block of code. If you use Mu (https://codewith.mu) as your code editor, you’ll have access to a REPL which is essentially like a console, meaning that you can print out text from your micro:bit. Mu also has a plotter which will automatically plot any tuples emitted using print– lucky for us, accelerometer.get_values() provides such tuples:
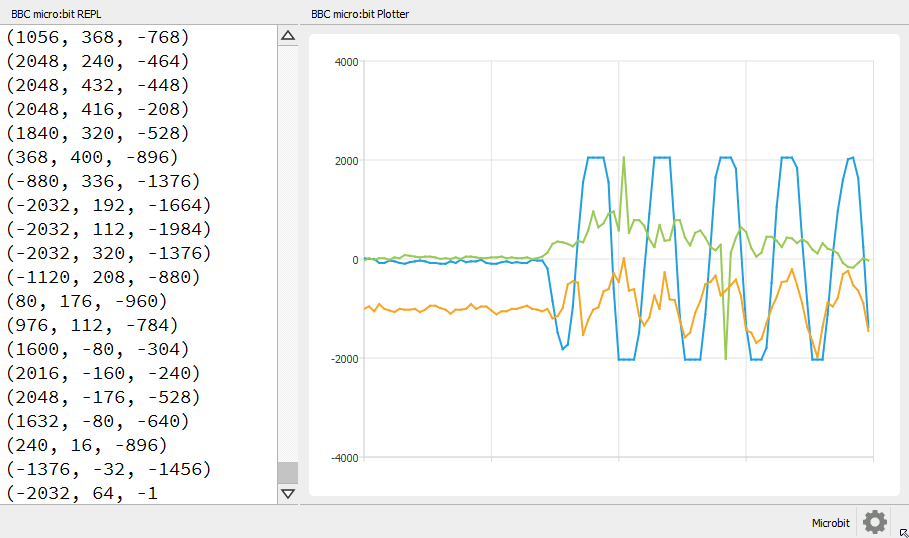
Pretty neat!
In the next part, I’ll discuss saving your data to the micro:bit’s memory and local storage. Stay tuned!